1 环境准备
本文环境:ubuntu 18.04、cuda 10.0 cudnn 7.6 python 3.7.6
1.1 必备环境
- Protobuf >= 3.8.x
apt-get install libprotobuf-dev protobuf-compiler
-
TensorRT 6.0 上篇文章tensorrt6安装教程
-
cuda和cudnn 之前的文章gpu环境安装教程
-
pycuda(可选,非cudatoolkit,如果有python安装需求的必须安装)
pip install pycuda
2 编译安装
2.1 拉取代码
git clone一定要加参数--recursive,不然之后编译会出问题!cmake中DGPU_ARCHS参数是你的显卡算力*10,(默认可不加)
git clone --recursive https://github.com/onnx/onnx-tensorrt.git
cd onnx-tensorrt/
mkdir build
cd build
cmake .. -DCUDA_INCLUDE_DIRS={你的tensorrt的cuda目录}/include -DTENSORRT_ROOT={你的tensorrt的目录} -DGPU_ARCHS="75"
make -j8
sudo make install
2.2 踩坑
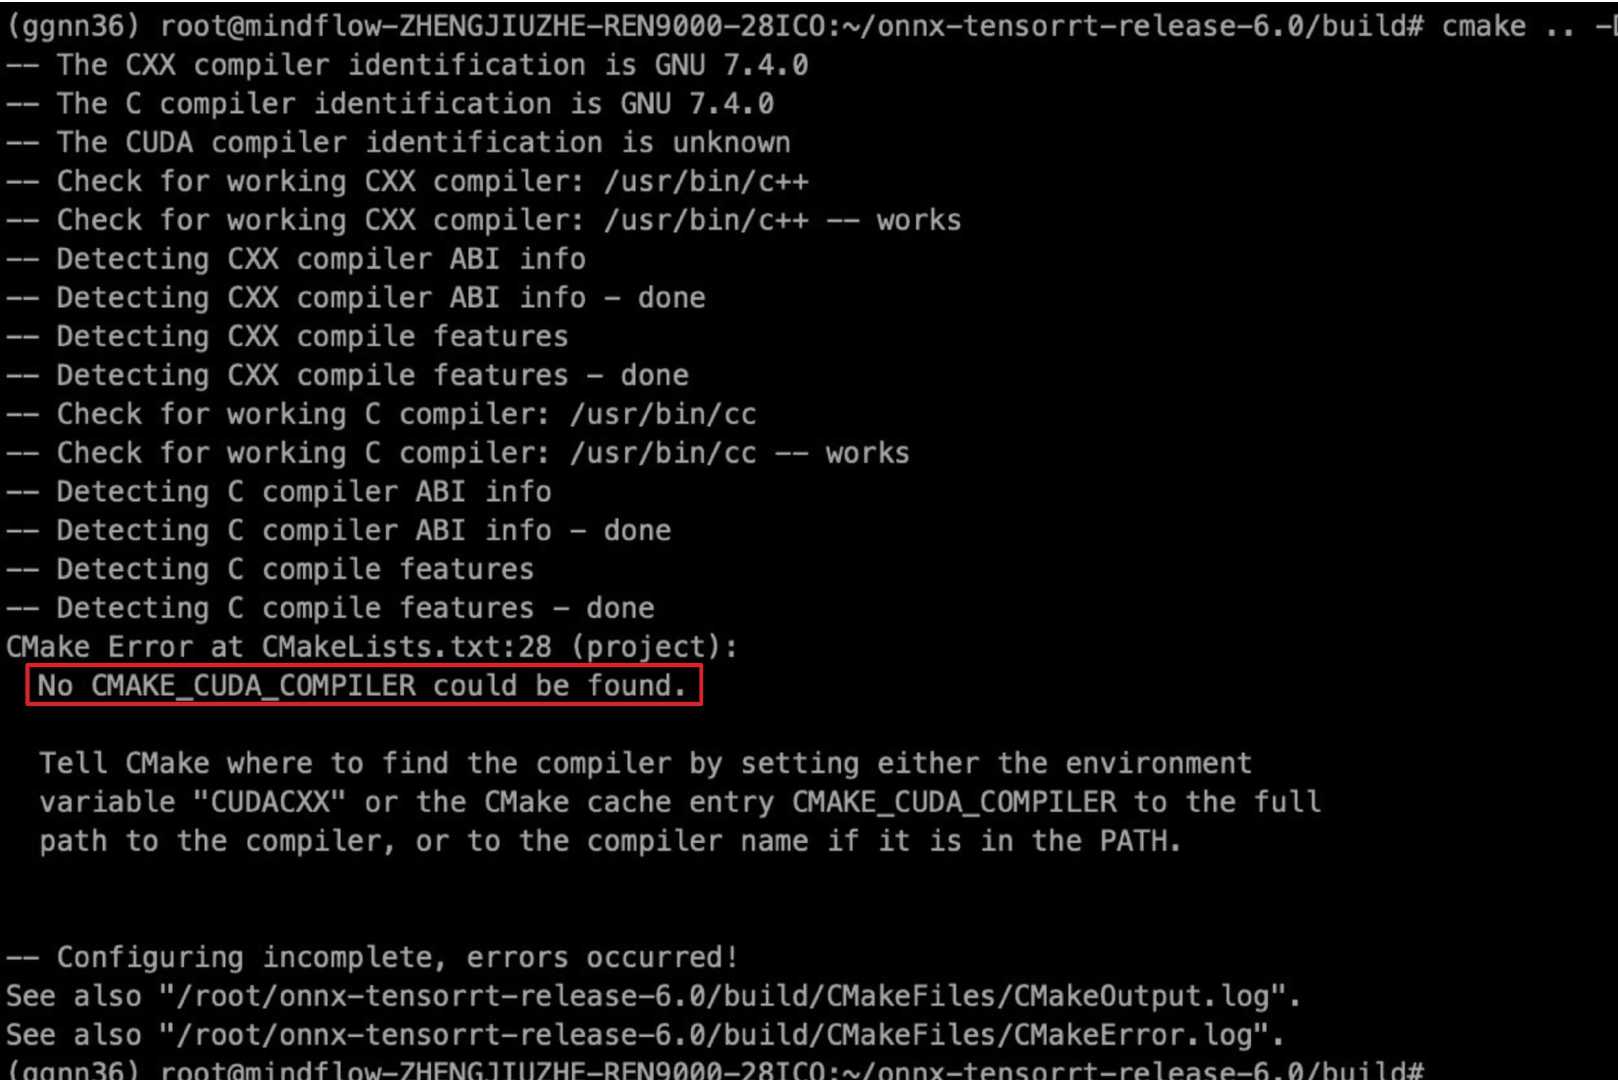
2.2.1 No CMAKE CUDA COMPILER could be found
原因:cuda没安装或没配置
解决方案:安装cuda和cudnn
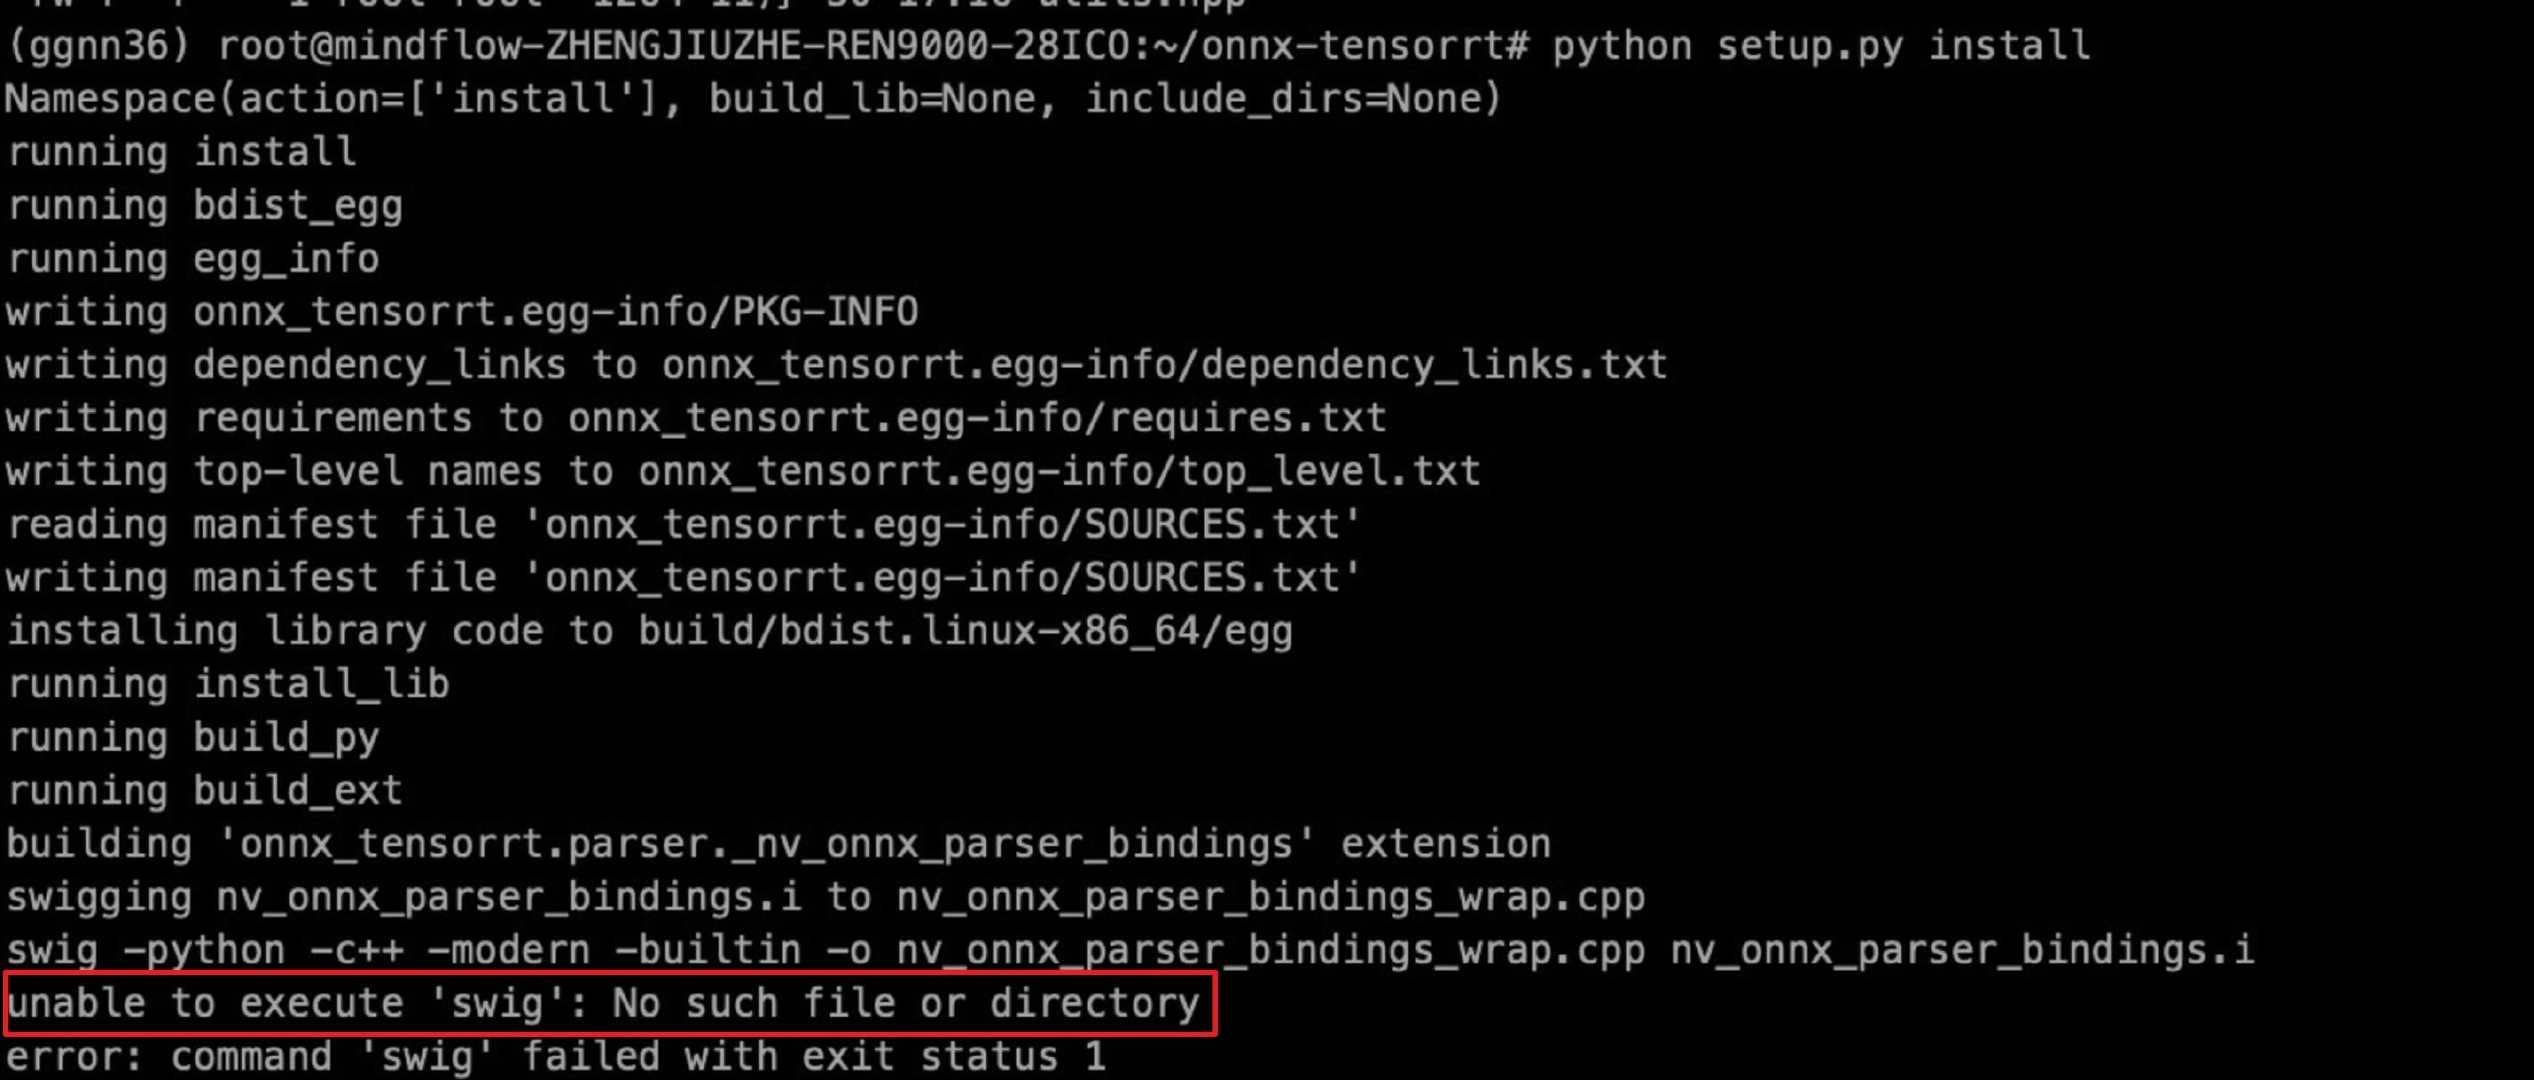
2.2.2 Unable to execute swig": No such file or directory
原因:swig未安装
解决方案:安装swig,sudo apt-get install swig
3 python的库安装
3.1 修改setyp.py
cd onnx-tensorrt
vim setup.py
在52行加入'-I{你的tensorrt目录}/include',
保存:wq
使代码变成下面的样子:
SWIG_OPTS = [
    '-I{你的tensorrt目录}/include',
    '-c++',
    '-modern',
    '-builtin',
]
3.2 安装
cd onnx-tensorrt
python setup.py install
3.3 踩坑
3.3.1 NvOnnxParser.h:26:10: fatal error: Nvinfer.h
原因:未找到文件路径
解决方案:按照3.1中的方法改写脚本

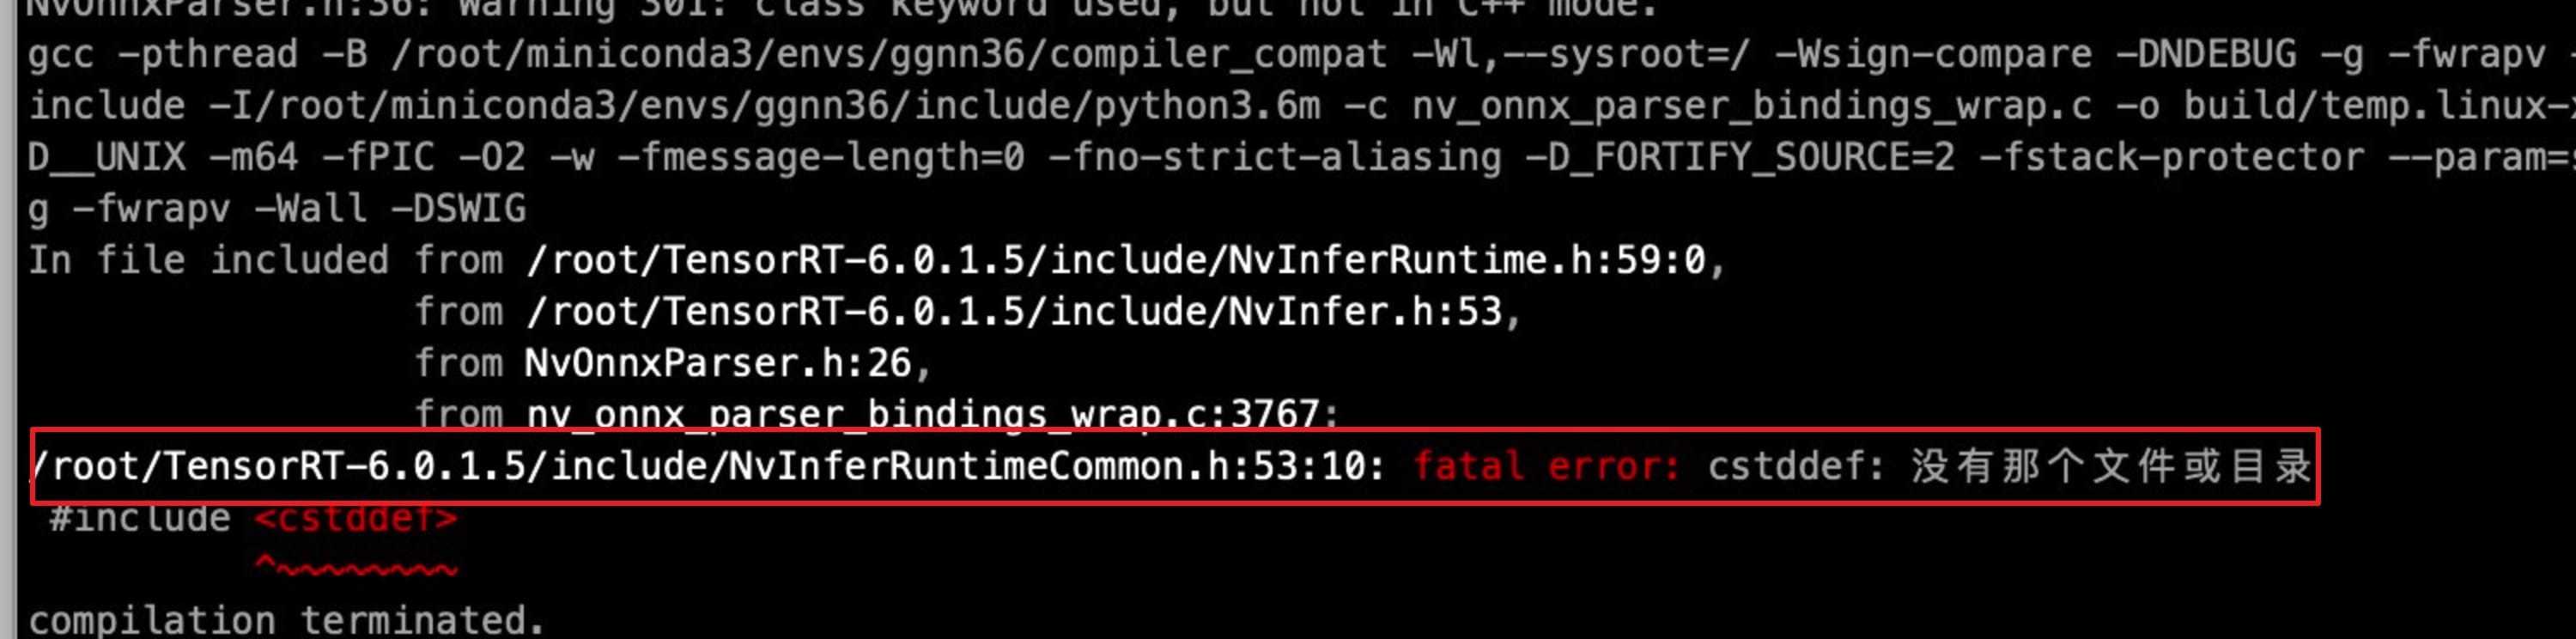
3.3.2 NvinferRuntimeCommon.h:53:10: fatal error: cstddef
原因:3.1中改写方法时,数组中少打了个逗号
解决方案:加上逗号